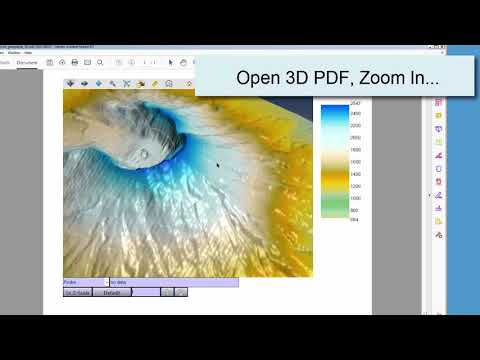
PDF3D ReportGen and PDF3D.IO development SDK can be used to convert geospatial formats to 2D or 3D PDF.
When converting geospatial formats, it may be desirable to integrate additional 3D objects which do not have any geospatial context embedded into their file type. It is possible to set the same geospatial coordinate system for both geospatial reference terrain and local objects.
Specify geospatial datum offset for local object using the interface settings position and scale menus. Specify the output PDF coordinate system also as the same UTM projected zone as the inputs.
Follow the example steps:
- Start a fresh session of ReportGen
- Load samples/grd/helens2.grd, set output file to %DOCUMENTS%/helens2_layered_geospatial_3D.pdf
- Load samples/x3d/flag_pole.x3d
- Tick the boxes on both of these to set the options and GRD and X3D interfaces, respectively.
- On Conversion tab open Output Coordinate system, set units to Meters,
coordinate system to UTM/UPS, set Zone=10, Subset=Northern Hemisphere (UTM) - On PDF 3D View tab open Insert Additional controls, tick Insert Controls for MOuse 3D PRobe,
Use Compact mode, set default Geo mode to UTM/UPS, tick Insert Controls for Z-Scale. - On Geospatial tab, first select Apply Settings to: helens2.grd (the terrain grid).
- Tick Coordinate system, set system to Projected, set PCS to WGS84 / UTM Zone 10N (EPSG:32610)
- Select Apply Settings to: flag_pole.x3d (the local object at datum 0,0)
- Tick Coordinate system, set system to Projected, set PCS to WGS84 / UTM Zone 10N (EPSG:32610)
- On Visual Effects tab, at top use Apply Settings To: helens2.grd
- Use Colormap File, change and select samples/colormaps/Terrain.clr (don’t apply to flag pole)
- On Animation tab, set Exploded mode to “unlock” positions (if version <= 2.17.0.10071).
- On Interface Settings tab, use Apply Settings to: helens2.grd
- Tick Object Position and Object Scale options, with default values position {0,0,0}, scale {1,1,1}
- On Interface Settings tab, use Apply Settings to: flag_pole.x3d
- Tick Object Position and Object Scale options, set
X Coordinate = 562679.0000000 (eastings)
Y Coordinate = 5116340.0000000 (northings)
Z Coordinate = 1872.0000000 (elevation)
Set General Scale = 100 (to magnify flag) - Push Convert, generate and open PDF.
- Zoom into volcano crater to see flag, use mouse probe to confirm coordinates.
